Tuesday, September 16, 2008

Setting your time zone


In /etc the file, localtime, is a link to or copy of a file containing information about your time zone. Zone information files are usually in /usr/share/zoneinfo but this depends on your distribution. So if your localtime file points to a zone info file that is not your time zone you can change it by browsing the directories in /usr/share/zoneinfo to find your country, then find your city or a city in the same time zone and link localtime to it.
    $ ln -sf /usr/share/zoneinfo/America/Los_Angeles /etc/localtime

Changing the date and time

Changing the date and time requires two steps. First, Linux's date and time must be changed and then the new time has to be written to the hardware clock.
The date command can be used for both viewing and changing the date and time.


To change the time use date followed by the month, day, hour, minute, and year all numeric and no spaces. So, to set the date and time to November 2nd, 2003 12:57


The hardware clock can be updated in UTC (coordinated universal time) or your local time. It is standard practice to update it in UTC.


To update it to your local time leave off the --utc or add --localtime and leave off the --utc.


Alternatively
The date and time can be changed directly to the hardware clock and then used to update the system clock.

Saturday, September 13, 2008

How to use torrentflux

Welcome to the major part of this tutorial. Using torrentflux. For your information, this chapter have been divided into 7 major parts.
a. Entering torrentflux
b. Adding torrent file
c. Downloading
d. To the computer

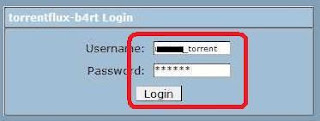
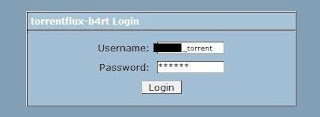
1. Go to your bookmarked torrentflux main page. insert your username and password for the password protected directories and then your torrentflux username and password. Click ‘Login’


2. Wait.


3. Click ‘ok’ if this comes out.


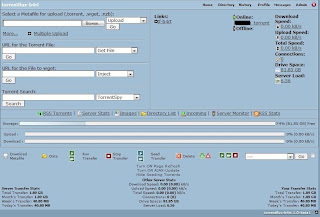
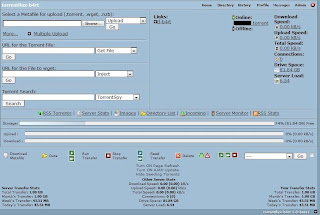
4. Congratulations! You managed to get into torrentflux main page!


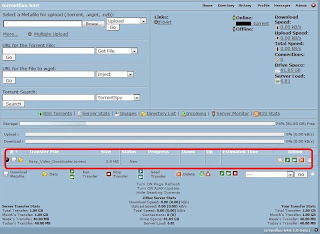
5. Click browse at the upper left.


6. Click the downloaded Metafile, click open.


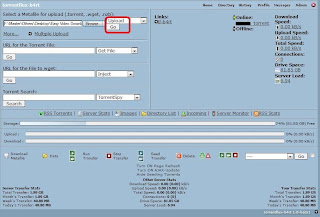
7. Make sure the drop box on your right is set at ‘upload’. Then hit ‘Go’


8. Wait.


9. Yes, we have successfully added torrent metafile to our torrentflux download list!


10. Click the play button.


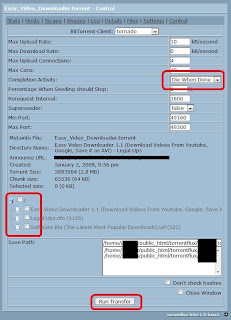
11. At completion activity, choose ‘Die When Done’ from the drop down menu. We don’t want to waste any bandwidth. Then tick the file you want to download. This is important since there can be more than 1 file in a meta torrent file and we do not want to download any unnecessary stuff aren’t we? Click ‘Run Transfer’ after that.

*Bandwidth is monthly transfer between a website and the surfers. For example, supposed that you go to a website and when you sum all the pictures sizes, webpage size etc and you’ll get a total 1mb. This 1mb is the amount of file transferred between the website to your computer. It is not significant for users but significant for web owner. Supposed that a web owner was given 500mb bandwidth from his or her webhosting company. Each time that 1 mb page is opened; 1mb of the bandwidth will be used. So, the website can only handle 500 visitors (500X1mb=500mb) per month and 501th visitor will not be able to view the website. This is just an example. In real life, each page files come out with different sizes. Some visitors may use 50kb, 3.4mb etc. So it is important to keep an eye on your bandwidth meter.


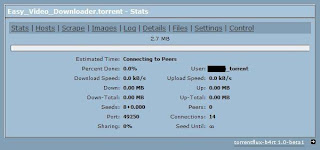
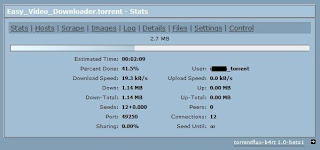
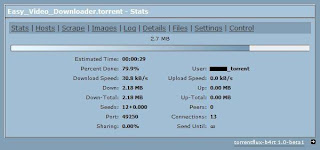
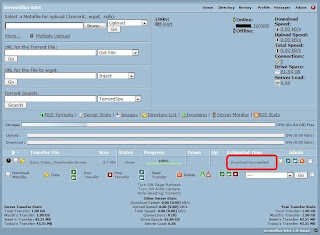
12. You will see this. Click stats to see the stats of the download.


13. Connecting to other seeds and peers…


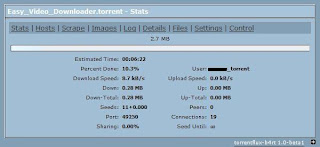
14. Downloading…


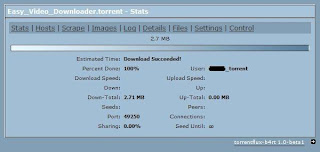
15. Succeed! Now close this window and head straight to your torrentflux main page.


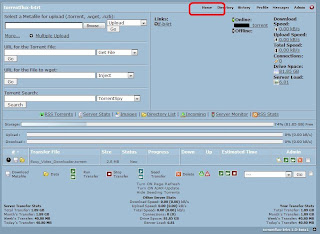
16. Refresh this page to get the latest update. Click ‘Home’.


17. You should see the latest update regarding your torrent now.

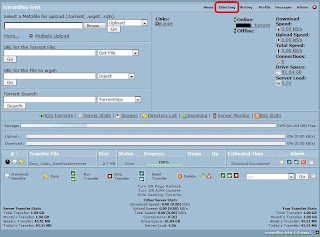
18. Click ‘Directory’


19. Open your username folder.


20. Open the folder. *You can download the whole folder by clicking the button that surrounded by the black box. It will save them as a single .tar file, some kind of zip file.


21. I want to download the first file, so I click the green pointing download button.


22. Save it to your computer.


23. Transferring the data.


24. Done! And it works!


25. To remove individual files, click ‘X’ button next to the file and click ‘Ok’ when asked.


26. If you want to remove the folder, simply do the same but now at the folder.


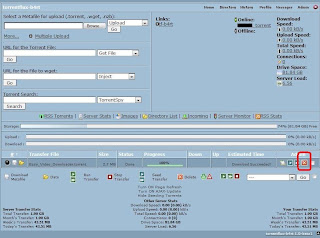
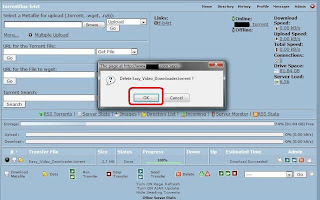
27. Files have been deleted but the torrent metafile is not. To do so, go to torrentflux main page and click ‘X’ like shown here. Click ‘OK’.

Torrent meta files and the actual files (that we download) are 2 different things. If you deleted the files, you can always redownload the files if you have the meta files. If you delete the metafiles, you can not redownload or resume your downloads.


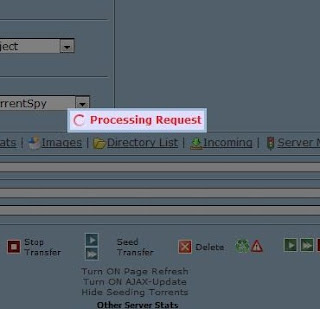
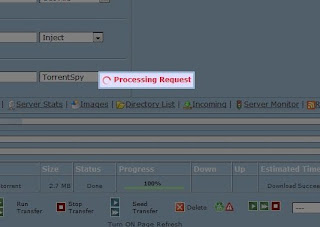
28. Processing…


29. There you go.


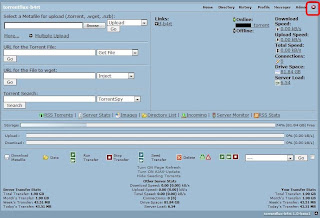
30. Now, to exit torrentflux properly. Click ‘X’ on the upper right.


31. And you are cool to go now.


http://torrentflux.blogspot.com/

Installing Torrentflux

Torrentflux. Whats is torrentflux ?.

Torrent flux is a php based torrent client which runs on a web server/ website.

Conventionally, people will install torrent clients such as azureus, utorrent which runs on their computer to do the torrent job and they are not php based.

Torrentflux will download the files to the web server /website first, and users are need to redownload them into their computer after the download is complete. Whereas computer based torrent client download the files directly into the computer and users are not needed to download them again.

People use torrentflux because:

1. Their ISP (internet company that they subscribe to) block torrent.

2. They do not have time to turn on their computer 24 hours per day.
3. To achieve greater speed!

The Torrent concept

Direct download, computer to computer such as downloading file from download.com, cause a heavy load on the web server. Imagine thousands of computers download thousands of files at to the same time, from the same web server.

Moreover, if the web server broke down, thousands will get affected!

So the concept behind torrent is to cut the files to thousands of pieces and begin to distribute them. After that, participants (or people who are downloading the files) will download (take) and upload (give) the pieces among themselves. Instead of relying on one computer, there are now relying and sharing on many people. More like of team work.

After all the pieces have been downloaded, ta-da! Your computer will assemble the files and now you have the complete files!

Major components

Anatomically, there are 3 major parts.

1. Torrent client – such as Torrentflux, azureus etc. Torrent client is the heart of torrent. It manages and downloads the file. It uses torrent meta files to get information regarding who have the pieces.

2. Meta file – associated with *.torrent type file, this piece of file are the navigator to the Torrent client to tell it where to get information regarding the pieces.

3. Tracker - A web server /website which manage who have the pieces. This is actually none of your concern and you have no power to it. This is the brain that manages and gathers information around the world, regarding who have the pieces. A torrent client uses meta files file to connect to trackers.

Supposed that one of these components unavailable, you cannot get the download process running.

Essential terms

Seeder – people who have complete pieces of the file(s)

Leecher – people who do not have all the pieces and are downloading it.

Ratio – The amount of availability of the file. If it is 1.00 and above, at least 1 copy of all the pieces are available and it is possible to get the complete files. 1.00 ratio means 1 complete sets of pieces. 4.00 means 4 complete sets of pieces. The more the merrier.

NEVER DOWNLOAD FILE WHICH HAS 0 SEED OR RATIO BELOW 1.00 !

What do I need to use torrentflux?

Here's what you need:

1. Linux based webserver

2. Apache

3. MySQL

4. PHP Version 4.3.x or higher

5. Perl 5.6

7. Apache

8. MySQL

9. PHP Version 4.3.x or higher

10. Perl 5.6

Frankly speaking there are more but not so significant I guess. As long as you have these stuff, your percentage to succeed is high.

One more thing, ask whether you web site company allows you to use the torrent. It is no use if you met all the requirements but your company blocks it

On your host, find out a working link for downloading Torrentflux at http://prdownloads.sourceforge.net/torrentflux/torrentflux_2.1.tar.gz?download
Choose a location near you and choose download. Cancel the download and write down the link shown below in blue (haven't found a way to paste text into my vmware-window yet)

back in your machine type:

wget

e.g.

wget http://belnet.dl.sourceforge.net/sourceforge/torrentflux/torrentflux_2.1.tar.gz

If you need to use a proxy server begin with setting up your proxy server in you current environment:

http_proxy=http://:;export http_proxy

or if you want this to be permanent: edit the /etc/wgetrc and fill the proxy settings there.
To edit the /etc/wgetrc file you need to know how to use vi, this is beyond the scope of this how-to.

Result:


All right, we downloaded Torrentflux, now on to installing it. Set mysql root password:

mysqladmin -u root -p password

when asked for a password: just press
it's the current mysql root password which isn't assigned yet.

Unpack Torrentflux:

tar zxvf torrentflux_2.1.tar.gz
cd torrentflux_2.1
mysqladmin -u root -p create torrentflux

cd sql
mysql -u root -p torrentflux <>

cd ../html


Set up the config.php:

vi config.php

Now edit the settings as below:

Consult a vi manual to find out how vi works.
After saving your updated config.php file copy the files to your web server root directory:

sudo mkdir /var/www/tf
sudo cp -rf * /var/www/tf

Create a folder to save the downloaded torrents

cd /home
sudo mkdir shared
sudo chmod 777 shared
cd shared
mkdir torrent
chmod 777 torrent

If everything went OK it's time to try if it's working and to set up the last bits in Torrentflux. To find out what the ip address is of your new server:

ip address

Look for the eth0 network card:
in my case the ip address is: 172.16.50.83

On your host: open your webbrowser and go to:

http://webserver_name/tf

Tadaaaa! :)

Login with: root and mysql password:

As a final step: change the path to: /home/shared/torrent and press 'Update settings'

Next Chapter "how to use torrentflux".


Sunday, September 7, 2008

Renaming Multiple Files with the Same Extension

sometime i have problem when i download or managing filename. because filename are same extension and disorganized.

so i use googling for searching script to help me managing file.

ok i write in here how to manage file in linux, of course command base, linux power full in command base.

To give a different file name extension to a group of files that share the same file name extension, use chcase with the `-x' option for specifying a Perl expression; give the patterns to match the source and target files as a quoted argument.

For example, you can rename all file names ending in `.htm' to end in `.html' by giving `s/htm/html/' as the expression to use.

* To rename all of the files in the current directory with a `.htm' extension to `.html', type:

$ chcase -x 's/htm/html/' '*.htm' [RET]

By default, chcase will not overwrite files; so if you want to rename `index.htm' to `index.html', and both files already exist in the current directory, the above example will do nothing. Use the `-o' option to specify that existing files may be overwritten.

* To rename all of the files in the current directory with a `.htm' extension to `.html' and overwrite any existing files, type:

$ chcase -o -x 's/htm/html/' '*.htm' [RET]

NOTE: Renaming multiple files at once is a common request.

Tuesday, September 2, 2008

Basics of basic assembly Programming

Why learn asm?

Assembly is seen by many as being too much work to do most tasks. This although partly true assembly is the one of the fastest langs around and is a low level language so it lets you get down and dirty with your machine. Asm also is a great learning experience and teaches you how your computer works.

Ok lets get started!

CODE
.model small
.stack
.data

Message db "z0mg ASM!!$"

.code
start:
mov dx,OFFSET Message
mov ax,SEG Message
mov ds,ax

mov ah,9
int 21h
mov ax,4c00h
int 21h

END start


Ok happy? Fin.
tongue.gif alright i guess i can explain it a little bit.
First all asm programs start off with a .model call. in this situation we use the small memory model which means that the data and code segments are separate but both are less than 64k. Ill explain more about memory models in another article.

The .stack call is required for .exe programs which require a call stack to function.

We then move into the .data segment. This is where all of your variables are stored.

CODE
Message db "z0mg ASM!!$"


In this example "message" is your var name. Db stands for declare byte and sets the size of your var. The "{:content:}quot; symbol terminates the string and also stores the string length in the var.

.code
This segment stores your code! Who would of thought that? tongue.gif

The first thing you'll notice is the mov command. This copies x into y. It doesn't matter what y is so it can be a value register or var etc however you have to make sure x is able to store the amount of data and is same data type.
Now were going to take a bit of a detour here to talk about registers.

For now were only going to talk about the 16bit registers. Our general purpose registers are:
#note to use their 32bit cousins add an "E" to the front of the name #
ax
bx
cx
and dx

Now all of those above registers are 16bits in size however they each are actually 2 registers. ax for example is split into ah and al. However ax al and ah can each be used separately for some tasks.

Now the next thing you'll notice is the SEG and OFFSET. During the early computer years they felt no one would ever use more than 1mb so the chip was designed to not allow anything over 1mb. The problem however was that to access 1mb 20bits were needed. Since registers were only 16 bits and they felt using 2(32bits) was impractical they decided to use SEGMENTS and OFFSETS to access 20bits using only 1 register.
EX:
OFFSET=SEG x 16
SEG=Offset / 16( the bottom 4 bits are lost sad.gif )
1 register has the offset and 1 has the segment if you put them together you have a 20bit address biggrin.gif .

EX2:
CODE
SEGMENT 0010010000010000---- OFFSET ----0100100000100010 20-bit Address 00101000100100100010


DS stores the segment and SI stores the offset. Note any general register can be used to store an offset except for the segment registers which are CS, DS, ES, SS.

^^ I hope you understand all that it took me a while to figure out.
The mov ds,ax points or segment and offset to create our 20bit register which stores our string.

Next we move 9 into ah then use int 21. Int cmds are interrupts are like functions and int 21 is the most common as it calls dos. When we use int 21 it searches ah for the function and in this case its 9 which is print string.

The final part mov ax,4c00h then int21 returns us to DOS. Ill fully explain it in the next tutorial.

Ok now you know how it works so lets compile it. I prefer to use tasm so thats how im going to explain it. Save the file as test.asm # or wtf you want.asm

CODE
C:PerlTTASM5BIN>tasm test
Turbo Assembler Version 4.1 Copyright (c) 1988, 1996 Borland International

Assembling file: test.ASM
Error messages: None
Warning messages: None
Passes: 1
Remaining memory: 453k


C:PerlTTASM5BIN>tlink test
Turbo Link Version 7.1.30.1. Copyright (c) 1987, 1996 Borland International


Well folks you have just learned the basics "hello world" style program and how it works in x86 asm. In the next tut ill cover input control and maybe even some graphical work. If you have any questions feel free to ask away.